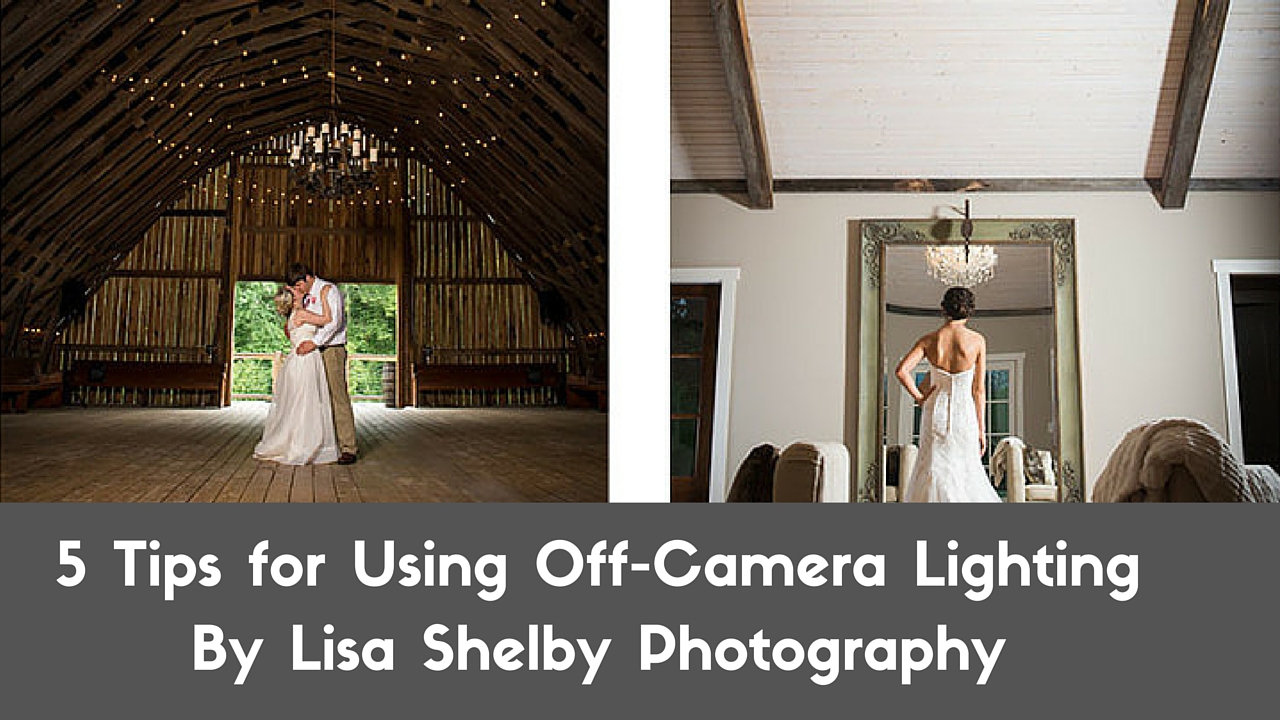
Lighting is one of the most important factors to make your photography stand out over others in your market. After you learn to control light and not just be a slave to it, you can take your photography to a whole new level. Back when we first started, we started out just like anyone else, trying to only shoot in the “golden hour” or where the lighting was just perfect, but as your business grows, you soon have to start working in the middle of the day or later into the evening, and sometimes, creatively, you want to know how to do different things with light to create different moods with your images. Also, let’s be honest sometimes there is a setting that would be perfect, but the light for a natural light shot is not there! You need to be able to say I love this setting and create the light and shadows you envision for that perfect shot!
There are A LOT of scientific and technical areas that come in with lighting, lighting power ratios (https://en.wikipedia.org/wiki/Lighting_ratio), the Law of Inverse-Square (https://en.wikipedia.org/wiki/Inverse-square_law), and may other items we can get into, but for the purpose of this post, we’ll just go over quick tips to help you get a good start on understanding how to work with light. Really once you get over your fear and jump in and just give it try, it really isn’t as scary and hard as you think!
I’m going to let Chris (my husband) do most of the writing because he LOVES this stuff. So, Chris it’s all yours… Try not to make it too difficult to understand…
So, you want to learn a little about lighting? Well, it’s a pain in the @$% butt at times, but here are a few little tips and tricks that Lisa and I have put together to make learning lighting a little easier. As Lisa stated there are a bunch of topics we could get into (e.g. lighting ratios and lighting patterns), but we’ll just keep it quick and dirty.
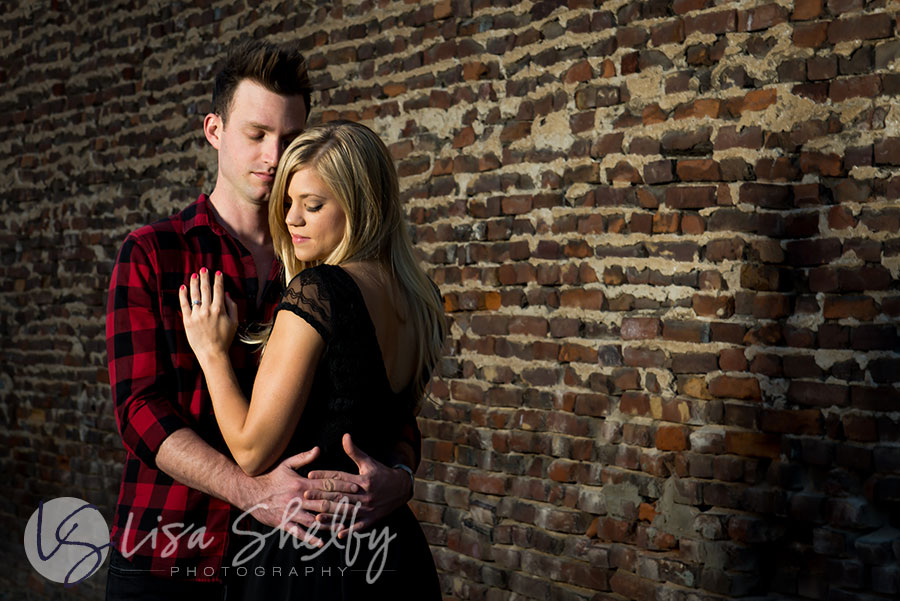
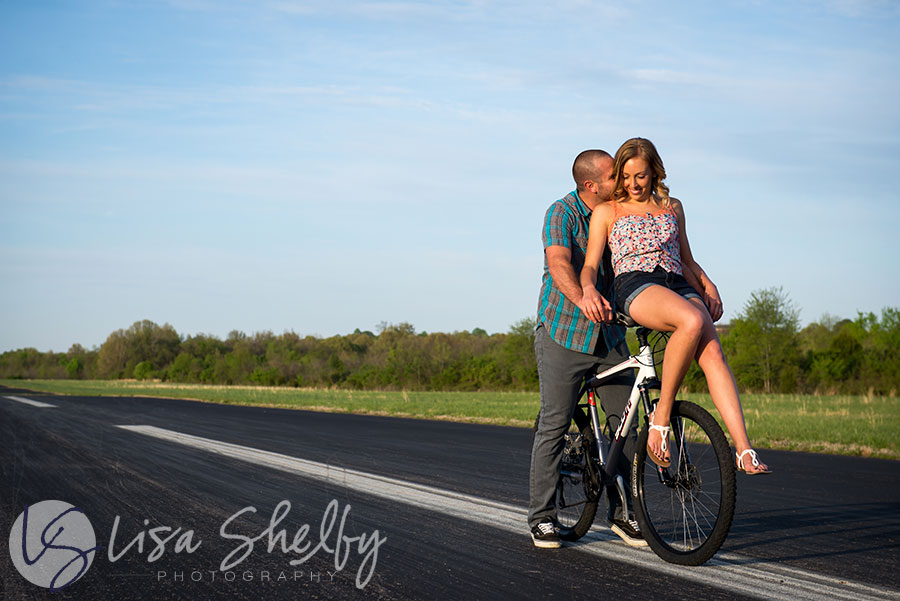
If you are anything like us, we don’t have the luxury of working in a studio at all times. We are either running and gunning at a wedding, getting 5 minutes alone with the bride and groom for a quick shot or two or in a field somewhere with a couple trying to get that “Pinterest” shot the bride wants to mimic (ugh, I know, but what can you do…). So with that being said, I’ve come up with a quick lighting setup that works great… I can’t take FULL credit for it, I can only pass along a little knowledge that I’ve gathered from other sources and filtered out to make it make sense to me. So with that, let’s get started…
Step 1) Choose your shooting position.
Simple enough! Choose what you want your background to be, easy peasy.
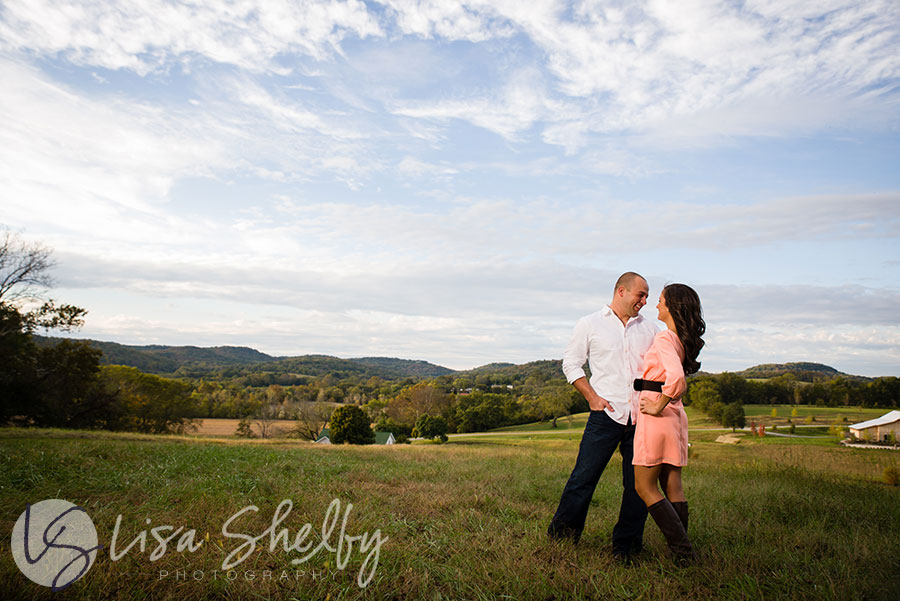
Step 2) Meter for your background.
I would say this is the most important part of creating the image you are trying to achieve. This sets the mood, so just setup your camera the way you want your background to be exposed. Typically, I like to underexpose the background just a bit to ensure that your subject is the main focal point… as you know the lightest part of your image will draw the viewer’s eye.
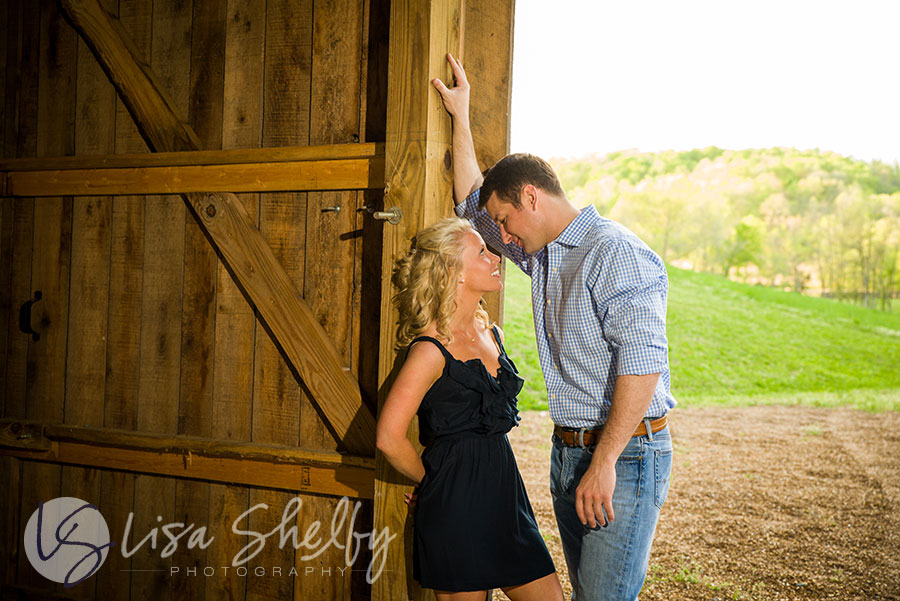
Step 3) Place your subject.
Now place your subject(s) in position, they don’t have to be in the exact pose you are going for at first since we are just testing the lighting, but at least where you want them to start out at. Once you have a good idea where their “stage” will be, you can move on to step 4.
Step 4) Place your light.
This is where things can get a bit tricky, but this is also where you can make the second biggest impact with your image. Pace back from your “stage” (where your subject should be standing) about 6-12 feet and place your light at a 45 degree angle to the relative place you will be standing (see the diagram below) (http://www.lightingdiagram.com/5oaxtwv8ax). You can always increase or decrease the angle where the light is hitting your subject, but this is a good starting point and will give you a good idea of how your light will hit the subject once you power it up. You’ll also want to raise the flash head slightly above your subject’s head and tilt it down just a bit; this will give your light a more natural direction.
Step 5) Set the power on your light.
At this point, go ahead and turn on your light and set it to about half power and take a test shot… Subject too hot? Back down the power! Subject too dark, bump the power up a little or a lot. At this point, it’s a matter of taste and testing to get the look you are going for. If you want to get technical, this is where the theories turn into reality! This is where all of the lighting ratios and lighting patterns come into play. I won’t go into those, because there are a ton of other articles and books written on these subjects by photographers who are much smarter than I am.
Wrapping it up.
Well, that’s about it, this setup usually takes about 1-2 minutes to setup between Lisa and I, most of the time, she’s interacting with the client, placing them on the “stage” and such, while I’m working with the equipment. Sometimes you will get in difficult situations where one light isn’t enough, eg. shooting in the middle of the day and needing to overpower the sun. A single flash won’t have enough power to do much, but you can always move the light closer (Law of Inverse-Square at work) or add another light.
Now, go out and make some art! Learn how light works and reacts to different things. Play with different types of lights and modifiers, and see what you can do!
 About Lisa Shelby Photography
Even more than capturing a moment in time, Lisa Shelby Photography believes your wedding photographs should give glimpses into your personality and story – the adventure, the romance, the beauty and the exquisite details.
What began with a desire to provide newly married couples with quality wedding photos has grown into our Nashville area business, Lisa Shelby Photography. Here we capture wedding images we wish we had to remember our special day! Like many engaged couples, we did not realize the significance of using just “any old” wedding photographer. Even though we regret this decision, it was a defining moment that changed the direction of our future forever.
As a husband and wife photography team, we balance each other well. Lisa has an incredible ability to stay organized, and Chris keeps the mood light and fun. When a couple hires us, we treat the day as if our clients are close family members.
Find Lisa on the Web: Website / Facebook / Twitter / Instagram / Google+ / Youtube / Pinterest