If you’re anything like me, you’re constantly looking for ways to improve your skill set and separate yourself from the pack. One way I’ve found success in this is by implementing the use of off camera flash in my wedding and portrait business. There were a few reasons for this decision early in my career. The first was necessity. It’s just me! On wedding days I usually have a second photographer to help me here and there, but during engagement and family sessions I operate on my own. My first inclination was to use reflectors, but I found them cumbersome, hard to set up accurately, and even harder to keep from falling over. A flash on a stand with a softbox attached just seemed a logical solution to these obstacles. The second reason was education. I am a big proponent of learning from the best, and everything I was reading, and all of the seminars I attended (and still attend) encouraged me to learn and use off camera lighting techniques. For me, photography was a hobby turned career. So, my thought was that if I was going to invest my life into developing my own business, I was going to take every opportunity I could to be the best photographer possible. I felt it limiting to only hone a skill set based on available light when I was seeing so many phenomenal images created by photographers who were using all available tools in their gear bag.
Why Use It?: Above are my initial reasons for learning and using off camera flash. However, I have found significant advantages to its use from both a technical perspective and to gain a competitive advantage in my market as well. For me the goal is to create photographs that stand out and look different from what I see daily and in tern offer my clients something unique and special. When I first decided to become a full time photographer, I was developing my skill set and found myself trying to make my photos look like what I was seeing on Facebook, Instagram, and Pinterest. As I’ve progressed, however, I work to establish my own style. The following are a few ideas that can help you break free from the pack or out of a creative rut.
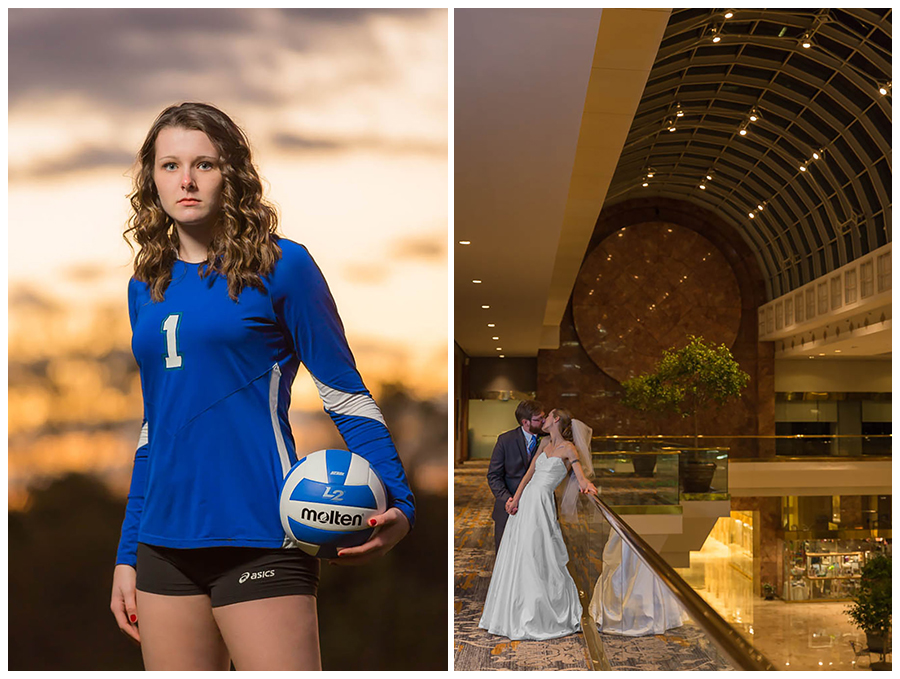
Catch Lights: Pinterest and the world at large love backlit images where the sun is bounding in creating an ethereal feeling and sunspots galore. I do too! However, I also love catch lights and I couldn’t get them to the extent I was looking for without off camera flash. With it though, I was able to put enough light back onto my subject and get those eyes to pop!
I had her walk toward me and switched my camera into AI SERVO mode (I use this whenever my subject is moving toward or away from me). Often I change my focus point to the where I’m going to position the subjects eyes to allow me to better track them in AI SERVO. As she walked toward me, I was able to capture a handful of keeper images and I chose this one to show how much of a pop I was able to get for the catch light.
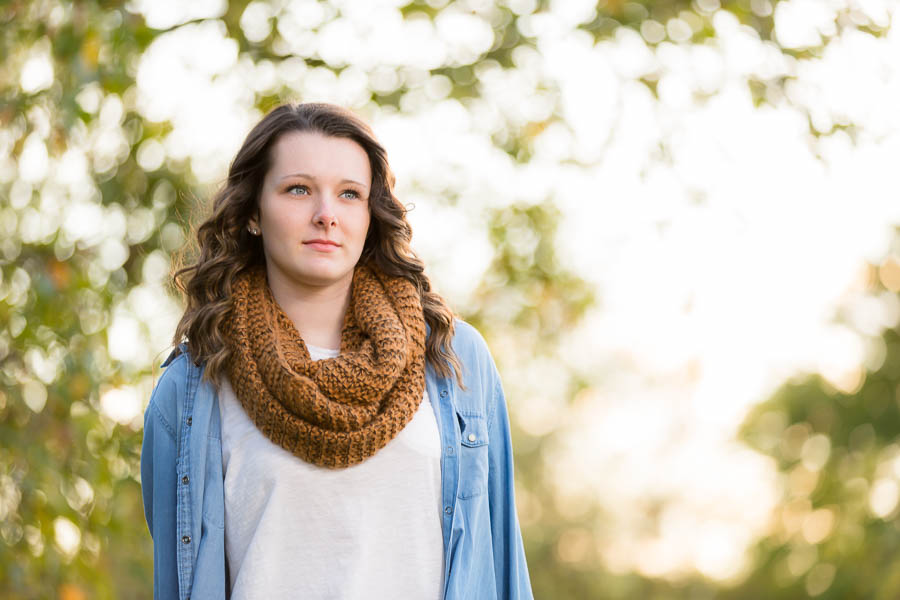
How I Shot It: Canon 5D MKIII, Canon 70-200mm 2.8L IS II at 2.8 and 200mm, 1/125 sec at ISO 100 at eye line. Canon STE-3 trigging a Canon 600EX-RT through a GLOW Parapop 28 inch softbox mounted on a Manfroto 12 foot light stand. Light position at roughly 45 degrees to subject left approximately 2 feet above subject eye line.
Extra Tip: You’ll see an example later where I wanted to keep the background exposed “properly” (a concept always up for debate) and therefore keep the detail. However, in this image I wanted to maintain a more “available light” (another debatable concept) look and just wanted to have the catch light pop. To do this, I used Aperture Priority mode and bumped up my exposure compensation like I would have if I had not been using off camera flash. I adjusted the flash accordingly to only fill in shadow a bit and add the catch light to the image. I use this technique for almost all backlit situations.
Differentiation/Diversity: In the town I live in it seems like there are a bazillion photographers. So, it’s necessary to find ways of making my work stand out. One way to do this is by offering my clients something unique. It’s fairly common to discover a new location and also fairly common to find someone using that same “new” location on the following visit. However, I have not seen a single photographer using off camera flash. Of the photographers I’ve crossed paths with in my market, 100% of them have been using a reflector, if anything at all, to put light on their subjects. So, while I do think reflectors can do a great job I use off camera flash to make my work look different and unique.
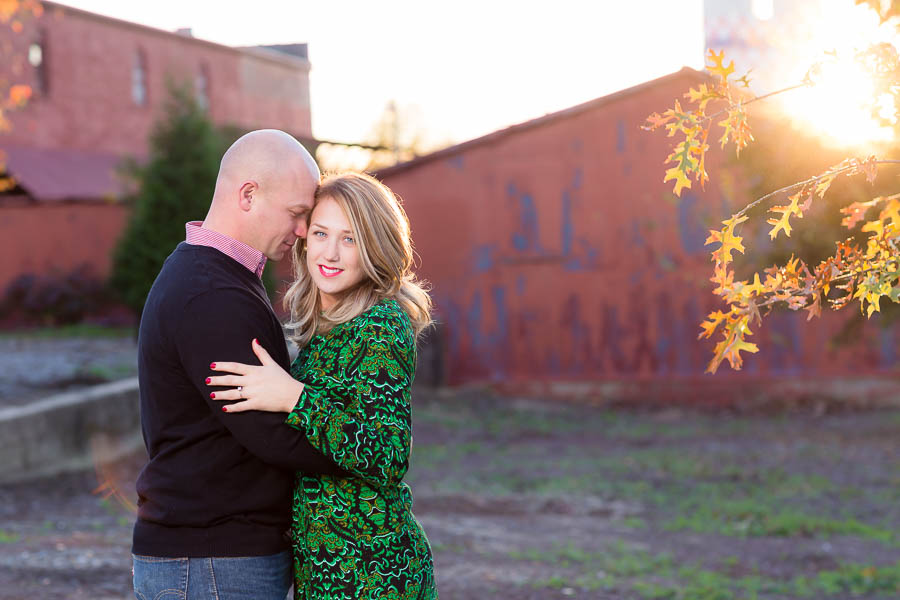
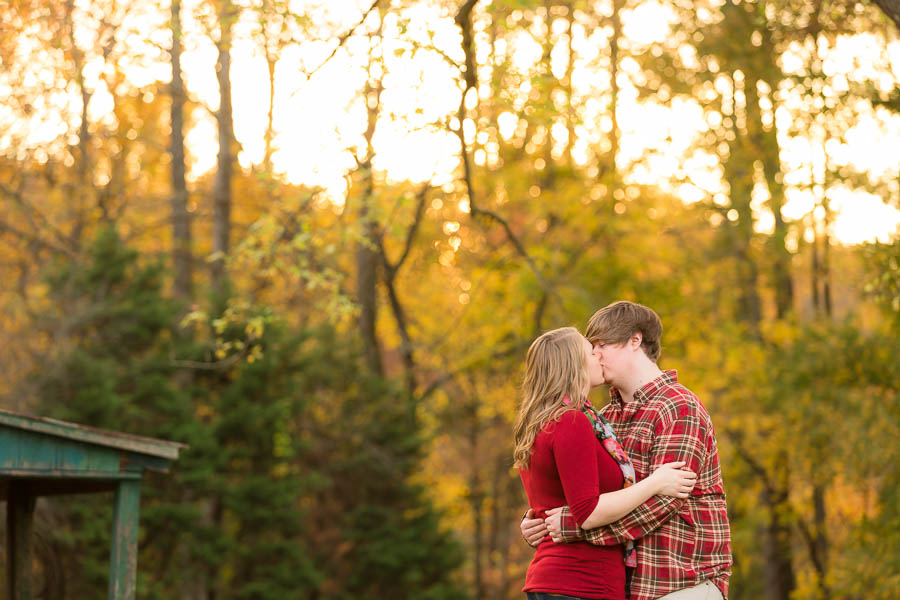
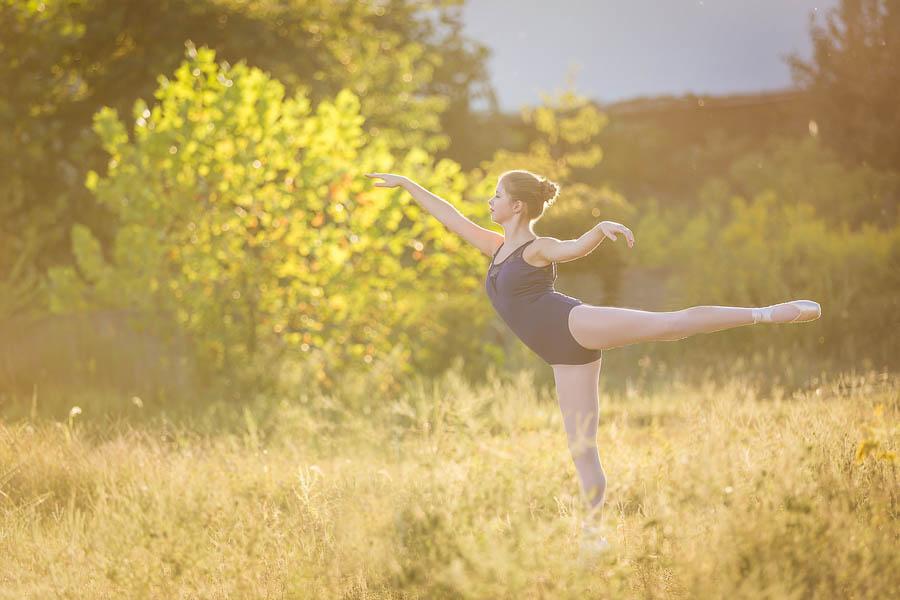
Below is an example of the difference in look you can obtain using off camera flash. The first image is what it typically looks like with a backlit subject using exposure compensation to expose for subject and blow out the back ground. I love this photo and use it in my portfolio. The second image is what I was able to create using off camera flash. I love this image and use it in my portfolio as well. You might like the first one or you might think the second one is great. For me though, it was about being able to produce both of them for my client and let them decide.
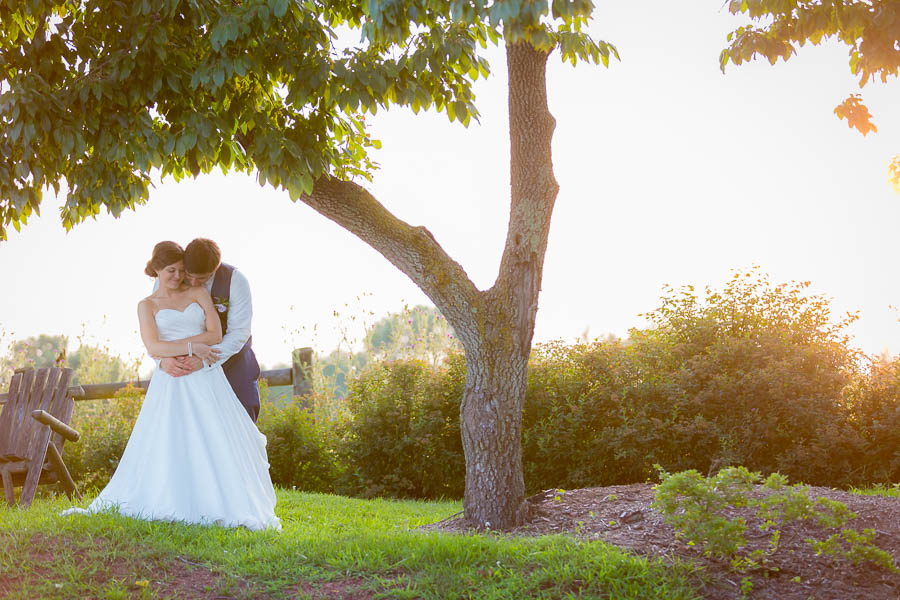
How I Shot It: Canon 5D MKIII, Canon 70-200mm 2.8L IS II at 2.8 and 125mm, 1/180 sec at ISO 400 in aperture priority, exposure compensation +2 (at least). I didn’t use off camera flash, nor a reflector.
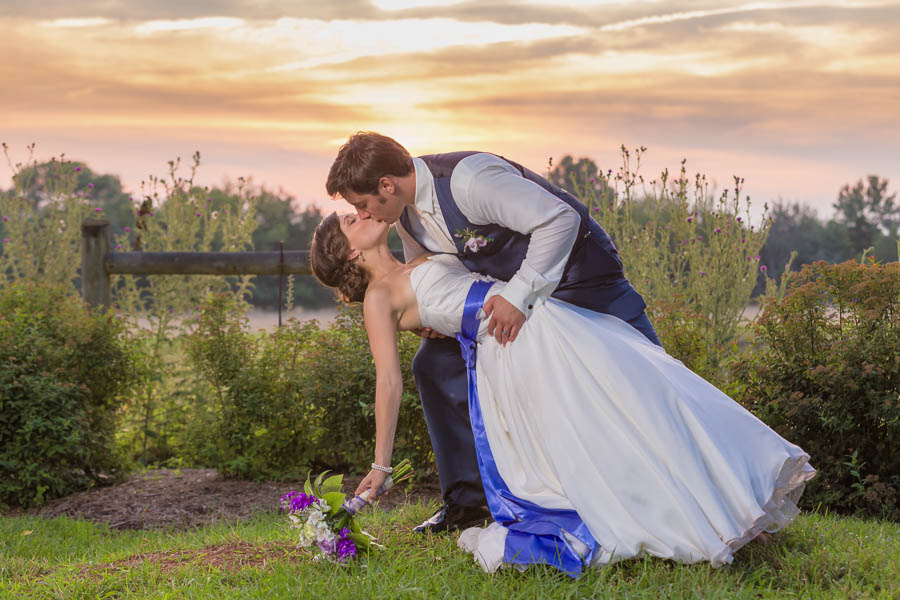
How I Shot It: Canon 5D MKIII, Canon 70-200mm 2.8L IS II at 4.0 and 70mm, 1/160 sec at ISO 160. Off camera flash setup: Canon STE-3 trigging a Canon 600EX-RT through a GLOW Parapop 28 inch softbox mounted on a Manfroto 12 foot light stand. Light position at roughly 45 degrees to subject right approximately 1 foot above subject eye line.
Extra Tip: The two photos above were photographed of the exact same couple, in the same exact location, at the exact same time of day, yet look nothing alike. I absolutely love both of these images and I know the couple in them does too. If I were to guess, they would have been completely satisfied with the first image I took using only the sunlight behind them. However, using off camera flash enabled me to create the second image and give them a completely different and unique look, which I know, blew them away. So, why not do that for your clients and for yourself?
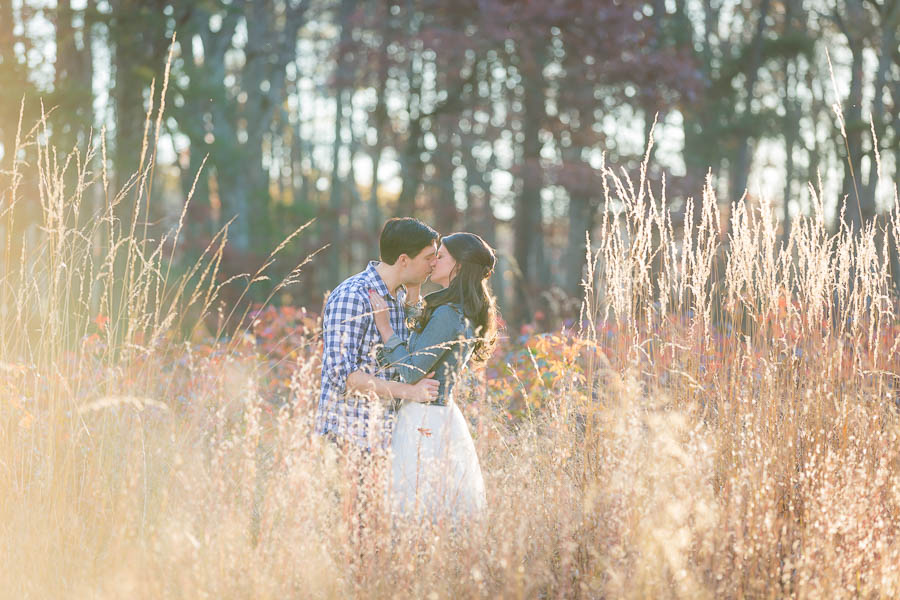
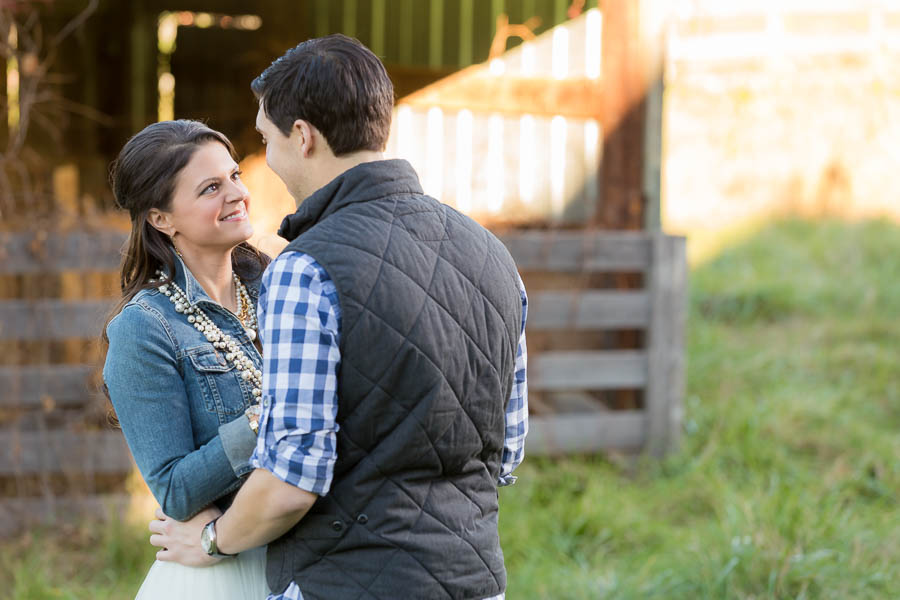
Versatility: Have you ever left for a portrait session beaming with excitement as you gaze into the sky at the glory of the day? You’ve perfectly timed the sunset knowing a gorgeous golden hour of magic light was in store, only to arrive on location and find the sun has dipped behind the clouds and the sky has become dull and flat. Ugh!! Granted, it’s easy to shoot on an overcast day when you don’t have to worry about uneven shadows and other challenges but what if you wanted to create something more dynamic? In the photo below, I was able to create the illusion of a sunny day by putting a ½ CTO gel over my flash and firing it through the softbox onto the back of my couple. It not only established separation from the background, but also enabled me to create the feel of a warmly lit day with great sunlight.

How I Shot It: Canon 5D MKIII, Canon 85mm 1.2L at 2.8, 1/200 sec at ISO 400. Off camera flash setup: Canon STE-3 trigging a Canon 600EX-RT 9with ½ CTO Gel) through a GLOW Parapop 28 inch softbox mounted on a Manfroto 12 foot light stand. Light position at roughly 6 or so feet above and behind subject slightly to subject left.
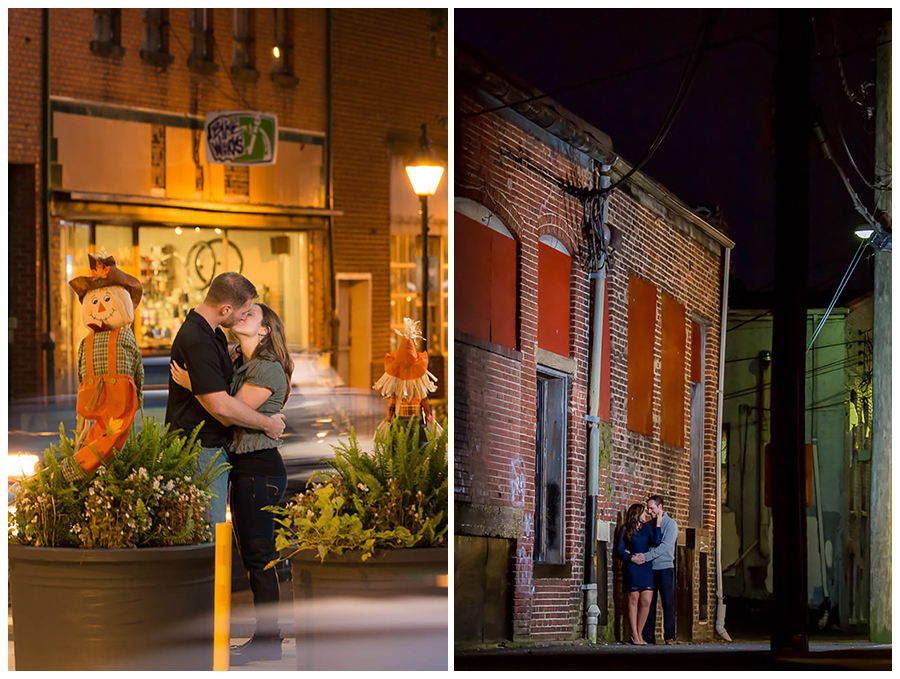
Going The Extra Mile: In the photo below, I used a similar setup as the one above. At first I was photographing this couple without off camera flash until I noticed the street light behind them and thought why not bring a little more dimension into the photo by putting just a touch of light on her hair to enhance the impact of the street light? The image would have been fine without it, but I wanted to add an element that would easily add just a bit more impact to the image.

How I Shot It: Canon 5D MKIII, Canon 70-200mm 2.8 IS II at 180mm, 1/60 sec at ISO 400. Off camera flash setup: Canon STE-3 trigging a Canon 600EX-RT 9with ½ CTO gel) through a GLOW Parapop 28 inch softbox mounted on a Manfroto 12 foot light stand. Light position at roughly 6 or so feet above and behind subject slightly to subject left.
Extra Tip: In a shot like this it’s important to give the off camera flash a reason to exist. Since there is no sun and it’s obviously already past sunset, it wouldn’t make sense for the light to be on her hair if there were no source for it to be coming from. In this case, the viewer’s mind would assume the light was either coming from the light in the distance or a similar one out of view, closer to the subject. The same rules apply to night photography. As in the pictures below, it’s important to make sure you have a light source. Although not really being used to light the subjects, it’s there to help the viewers mind understand that light in the photo is coming from somewhere and seems normal. I think of it like the difference between good and bad acting. Good acting makes you forget you’re watching someone act. Bad acting makes you cringe and it’s obvious the actor isn’t behaving like they normally do. This also applies to indoor photography so make sure you position you light to come from a direction where another visible light is coming from.
I’m a better photographer today than I was yesterday. I know some of you are thinking about one or two of these scenarios that you can use some Photoshop tool, overlay, or something to create a similar effect and that’s probably true. For me though, I’d rather spend time behind my camera than in front of my computer. I’m not super old school and I’m not a photography purist by any means, but I do believe that if I’m going to be a professional photographer I should make every attempt possible to, as I’ve heard so many times, get it right in camera. I’ve found the use of off camera flash helps me get the results I want more consistently and more accurately than I can without it. Admittedly, I did find it intimidating when I first began using it but it has since become a regular part of how I work. I don’t use it for every shot, but I do find when the right time comes along there isn’t another tool I’d rather have in my bag.
Here are some other examples of when I used off camera flash:

 Matthew Thwing is the owner operator of Matthew Thwing Photography a wedding and portrait photography company based out of Fredericksburg Virginia. Matthew first fell in love with wedding photography working as a second photographer for his fathers company in the late 90’s. A hobbyist turned professional Matthew’s passion for landscape imagery can been seen throughout his work. When he isn’t behind the camera for a client he’s behind the camera with his family including 3 sons age 9, 7 and 10 months. He and his wife Peggy also recently found out number 4 is on the way!
“When I photograph landscapes I’m struck by the wonder and excitement of new scenery. When I photograph people I’m struck by how important the images I’m creating for people are. It’s something I realized while working for my dad in his business some time ago and something I have in the front of my mind whenever I’m with a client.”
Matthew also loves teaching photography and will be hosting a workshop on April 9, 2016 on off camera flash. You can receive more information on this and other classes by emailing matthewthwingphotography@gmail.com
Find Matthew Thwing Photography on the Web: Website | Facebook | Instagram