Light leaks have been part of photography since the invention of the pin-hole camera, but it is only with the arrival of digital photography and image editing that everyone has been able to incorporate this really cool effect, in the form of light leak overlays, into either casual photography or professional work.
If your photography project calls for that heaven-like ethereal look, it is good odds that what you need is the sublime intervention of this exquisite tool. Sometimes, a lens flare effect may also be used for similar purposes as a leak. Together, these two tools can be quite effective in making a normal photo a true work of modern Art.

Some of a number of benefits and ways to use these tools are:
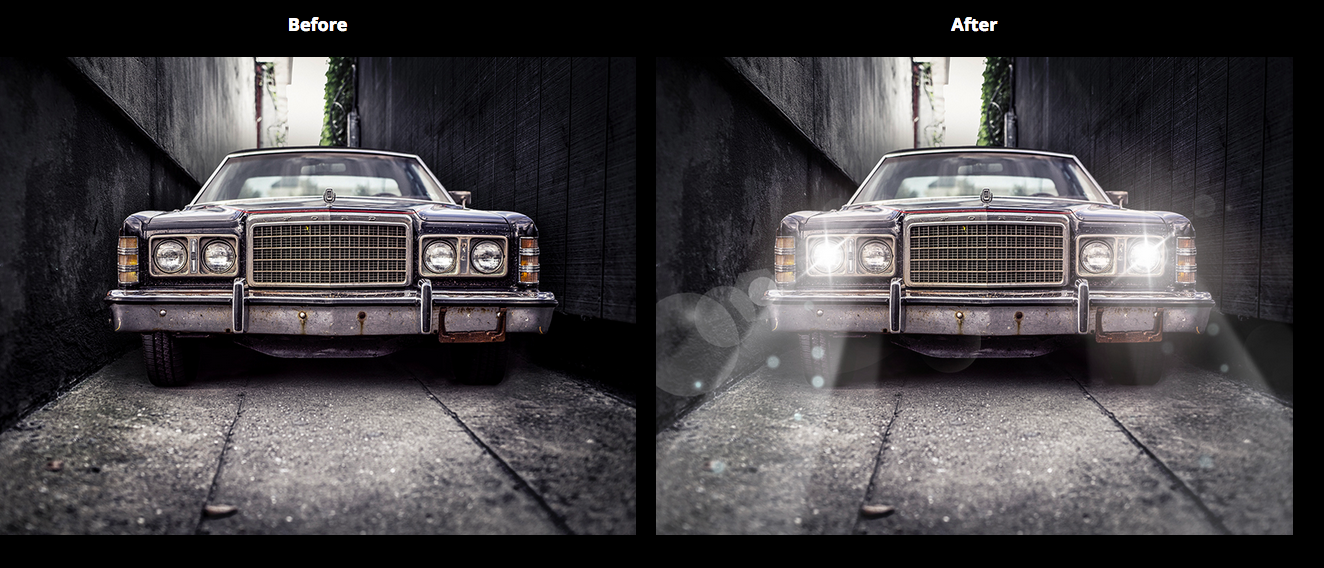
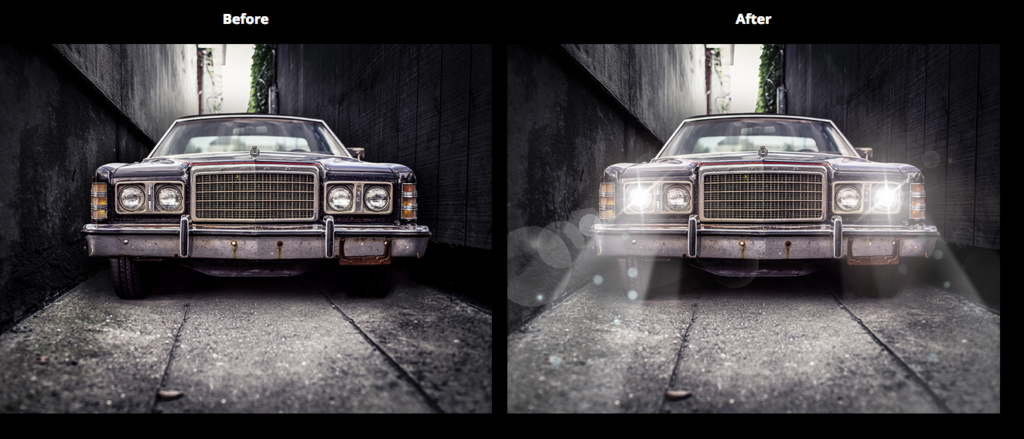
- Generate practical lighting that is absent from the photo originally, such as the glare from the sun or the glow from a street lamp. Your photo might be missing certain light attributes. You can restore that with one of these light resources.
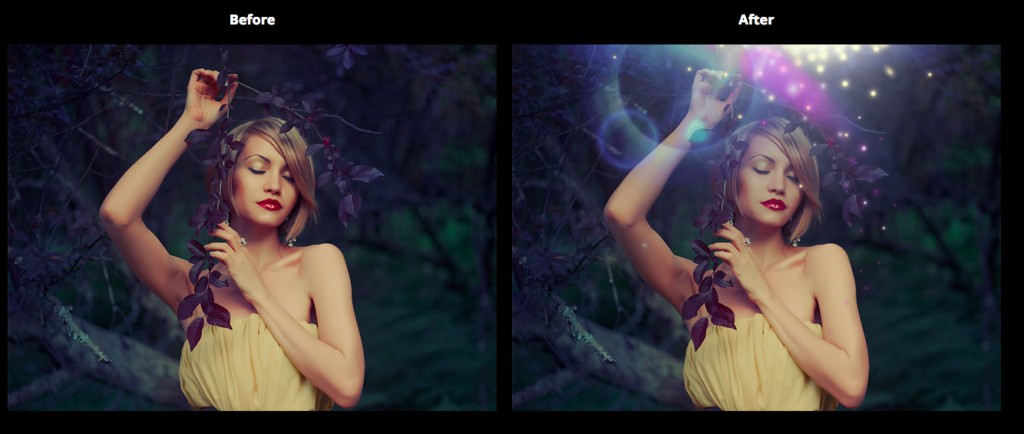
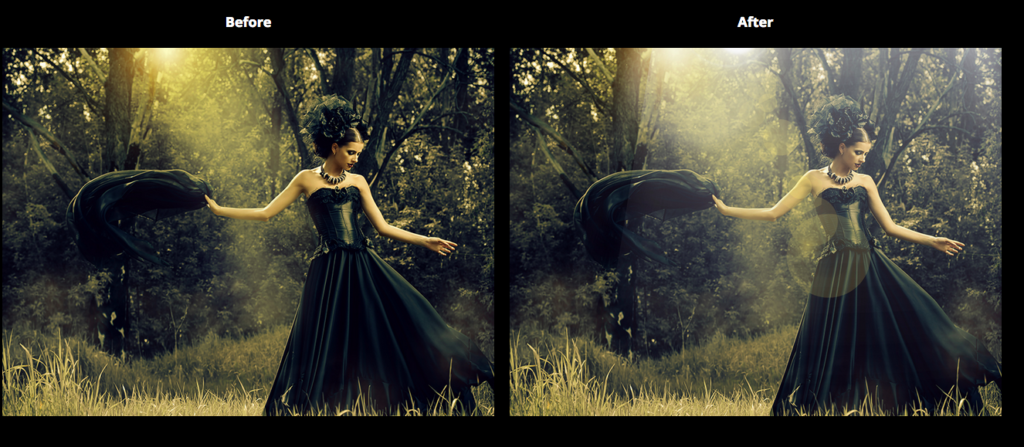
- Create conceptual lighting such as a haze, or a vintage effect that gives your photo a retro look. Any other lighting idea that comes to you that adds a little zing to your photo can be achieved quite simply.
- To stylize your text and other objects in the photo. Light resources can transform basic tests and other design elements into icons of beauty and power.
- Gives your photo great production value. Photography is all about, well, image and perception really. You can make your photos look like it was done for a million bucks with a few well placed light leaks or lens flares.
- Get professional results using simple tools? It is amazing that you can attain the high-tone polish of a top level expert just by adding these light elements in a creative way.
- Use this to relight photographs in post. Have a photo that is just not right, light wise? Worry no more. Relight part or your entire image with these elements.
- They are easy to use. The great thing about these design resources is their basic simplicity. For most photo editors, you only need to add the layer, and set to screen.
- The file formats are compatible with most image editors being basically tuned up jpegs mostly. So no matter what software you have, they will work just fine.
- They are scalable, so can fit any photo resolution. You can enlarge or reduce, narrow or stretch, whatever your photo requires.
Now, though, how difficult is it, practically speaking, to add light leak overlays to your photos?
First Steps
To add this effect to your photograph would be fairly easy, somewhere between novice and intermediate in difficulty level.
Some important things to note when using this tool are:
- Reference: If at all possible, get a visual reference for the look you are going for. This will guide you on the finished look after you want with the effect.
- Less is more: Subtlety is the keyword here. The objective is to make the leak a natural part of the image.
- Remember to blend: Depending on your software, a number of tools will present themselves in order for you to naturally blend the effect into your image or photo.
- Plan the image: While it is certainly possible to add this effect as an afterthought in post, the best results are obtained when you originate the photo with tool in mind. As much as possible let your photograph be one that the light leak can be a natural part of. Of course light leaks overlays are also used in heavily stylized situations in a purely abstract way, but if you are not doing that, a naturalistic or near-naturalistic depiction would be the way to go.
Photographs that might not work with Light Leak Overlays
- Official Photos: Any photo that calls for a stiff collar might not be ideal for light leak overlays. This would include official portraits, passports photos for official documents, and so on. When in doubt, always ask the client!
Having noted the above, remember not to stifle your creativity, and your final picture is exactly what you make it!
Doing the Leak:
- Get the light leak overlays or lens flares into your image editor.
- Choose a suitable photo. Or you could take one specially to test this effect on.
- Click on the effect in your software and apply it to your image.
- Try several kinds of overlays on your image to see how they look.
- When you have found one you like, it’s time to tweak it a bit. Use blending modes like screen (if you are using Photoshop or Fireworks) to make the effect work best. Play with the opacity also. Feather a bit if your software allows you to.
Light leak overlays and lens flares bring immense value to your photographs in an effortless way. They work within a variety of image editors and are fast and easy to use. Using these, you always have all the tools you require to make your images really pop.