Scout a location/drive around to find the best place
By checking out a place beforehand you can be better prepared to capture the scene in the best possible way. E.g., will you need a tripod, what time of day holds the best light, which part of the area holds the most interest for the picture? E.g., shapes and patterns, strong foreground elements, leading lines. You can do research online too, see what photos have already been taken there. This can help you to see what’s possible, and to think about other ways/angles to capture that scene. These days there are apps too such as Stuck On Earth where you can discover countless places to visit.
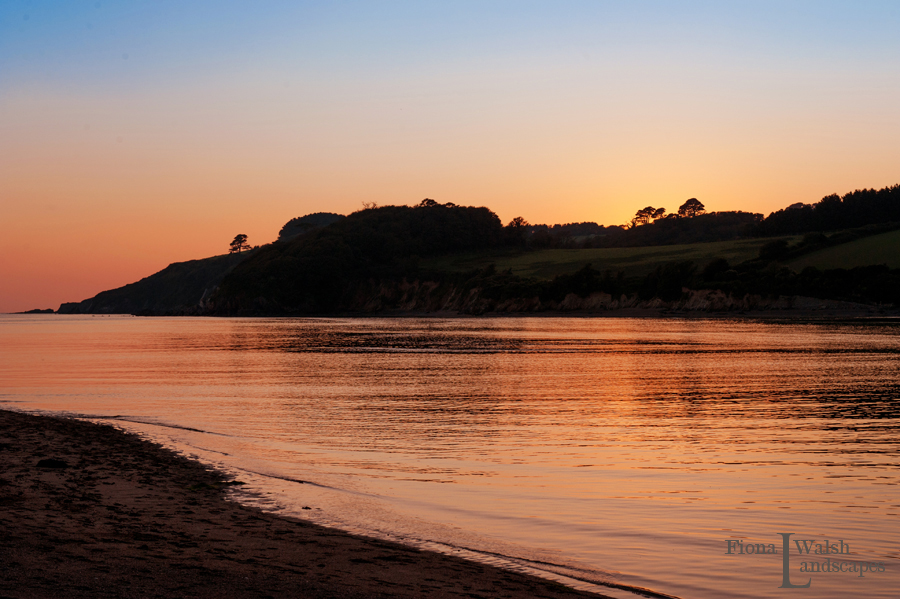
Arrive early and stay late
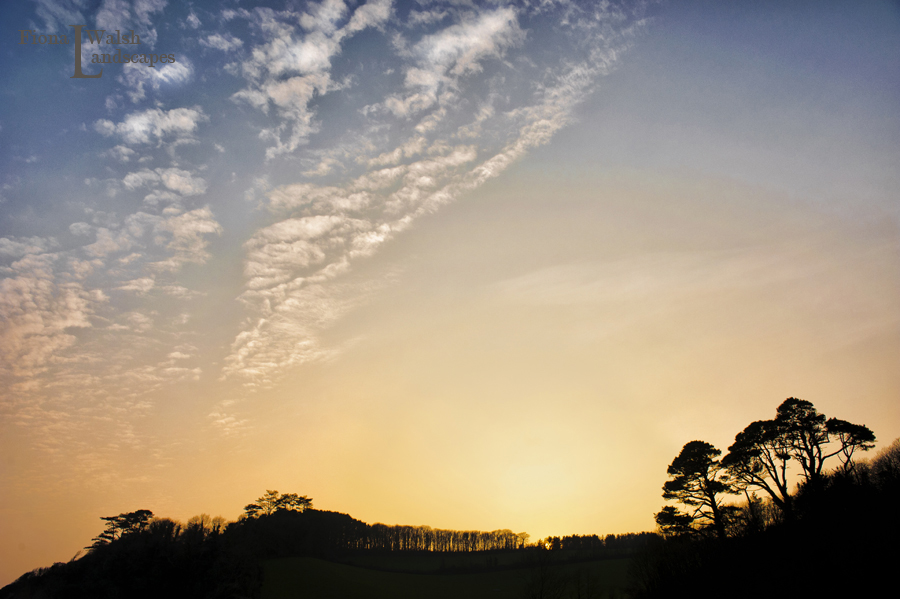
This is the golden hour I love to shoot. I often look forward to the hour following a sunset as the colours can be beautiful. If there are clouds you can expect an interesting sky.
Nikon D700, 1/1000, f/8.0, ISO 400, 24-70mm lens at 27mm.
Nikon D700, 1/3200, f/4.0, ISO 640, 24-70mm lens at 70mm.
Nikon D700, 1/160, f/5.6, ISO 1000, 85mm lens.
Nikon D700, 1/320, f/10, ISO 320, 24-70mm lens at 56mm.
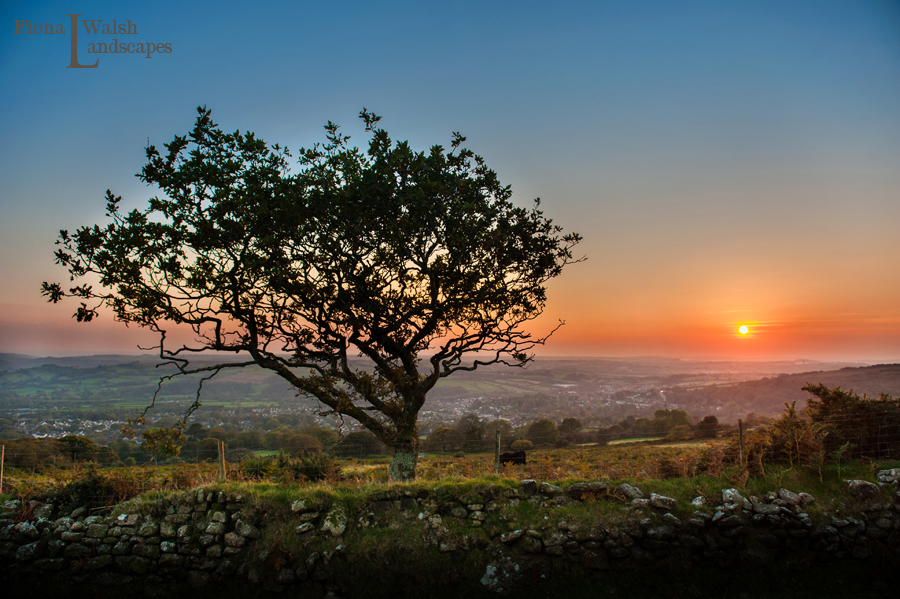
Look for silhouettes:
Nikon D700, 1/500, f/4.5, ISO 200, 24-70mm lens at 24mm.
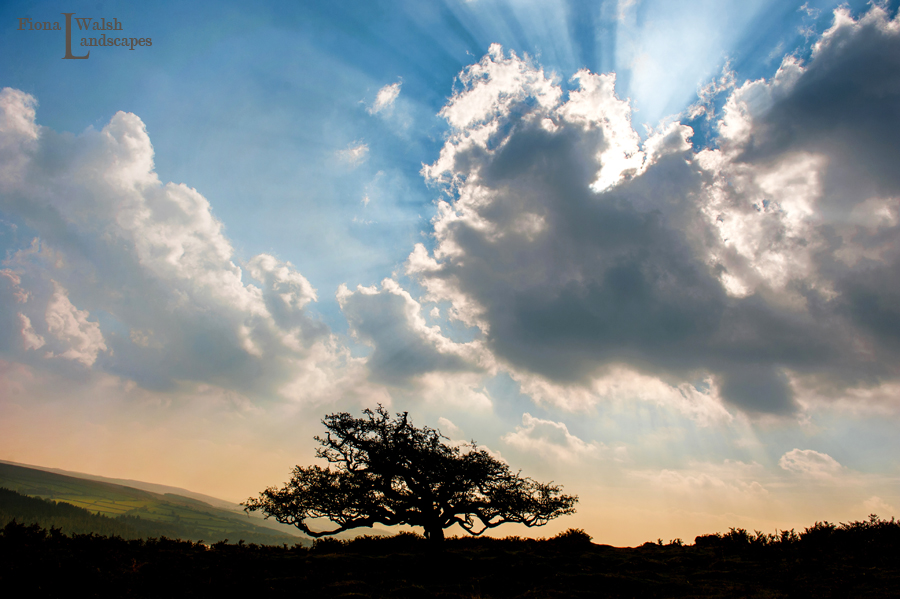
I arrived a couple of hours early and noticed this tree. I moved into different places to see how low I could get to place the tree against the sky.

Nikon D700, 1/2000, f/8.0, ISO 200, 24-70mm lens at 24mm.
Also notice a) the importance of shooting in RAW. I was able to bring out colours and decrease highlights and exposure to make this look dramatic b) allowing plenty of time at this spot gave me opportunity to capture different scenes. This looked completely different when the sun was much higher, and when the sun was setting.
Nikon D700, 1/4000, f/6.3, ISO 200, 24-70mm lens at 28mm.
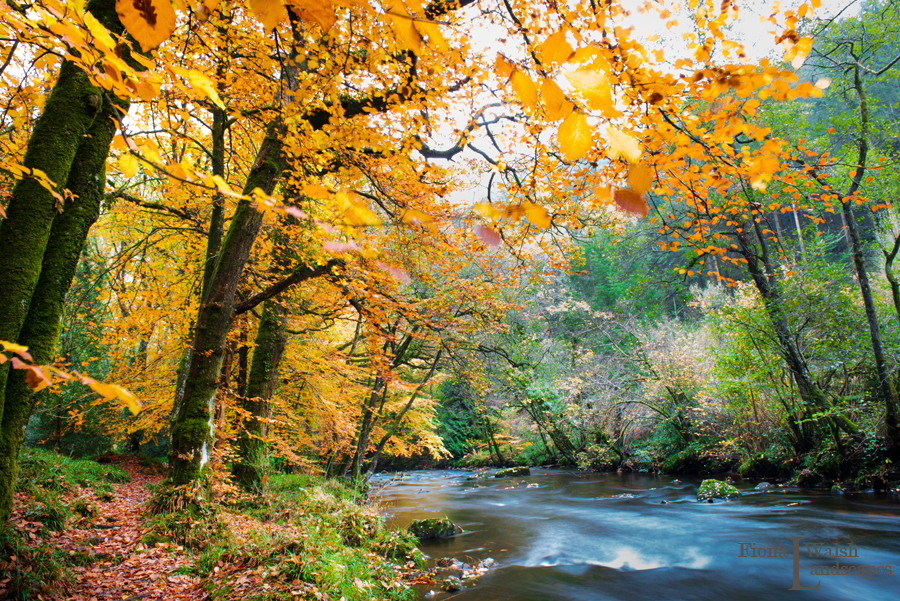
Use a tripod to increase sharpness and use a remote cable release or timer. A tripod can allow you to use slow exposures which would capture water moving. I didn’t position the river in the centre of the frame as I wanted to bring in these beautiful golden trees. They frame the image too I think.
Nikon D750, 5 seconds, f/16, ISO 50, 24-70mm lens at 24mm.
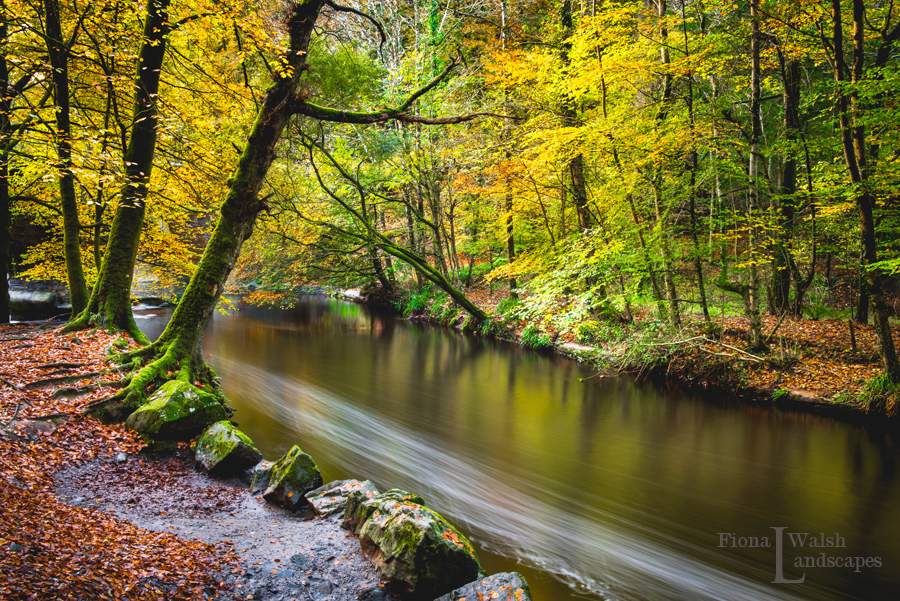
Nikon D750, 10 seconds, f/16, ISO 50, 24-70mm lens at 36mm.
Shoot in RAW
As mentioned above, shooting in RAW can allow you to manipulate/adjust the different dimensions of the image e g., dropping highlights, pulling out colours etc.
Using software like Photoshop or Lightroom:
This can help enhance the colours in the image and highlight specific areas. In the first image of this article I brought in the blue sky at the top of the frame. I could have chosen to have the whole sky in the yellow tones. In the river image I was able to highlight the reflection of the trees in the water, which wasn’t noticeable in the shot before editing.
Shoot at midday if you want to capture those blue/turquoise colours in the ocean.
Shoot at the lowest ISO.
This allows for sharper, smoother shots. The higher the ISO the more grain in the pixels.
Get as much in focus as possible:
So use a small aperture. Use a mid-range aperture (like F16) rather than wide open (like F22) to avoid what’s called ‘diffraction’ and this way you will achieve sharper images.
Getting a little more technical, you can aim for really sharp images by setting the hyperfocal distance on your lens. This achieves an optimum depth of field in a photo, but you can still achieve gorgeous images without doing this. Check out this website to learn more about it and how to calculate it.
Rule of thirds & composition.
There’s that main rule of photography again; the rule of thirds. It is definitely something to go by, but then take your photo again without using the rule. Make use of the sky in your images. Adding in a little bit of the ground below accentuates the expanse of the sky above.
Be open to other potential shots around you. Sometimes I can be so focused on the scene that I went there to take that I might miss other shots around me. I was walking back down the hill to my car when I noticed this gorgeous group of trees. I positioned the tors to the left of frame, and added a little bit of sky and foreground to bring in different colours and landscape. Notice how those top and bottom aspects of the image serve to frame the trees in the middle. Use the space in the frame wisely. Then using Lightroom I enhanced the autumnal colours.
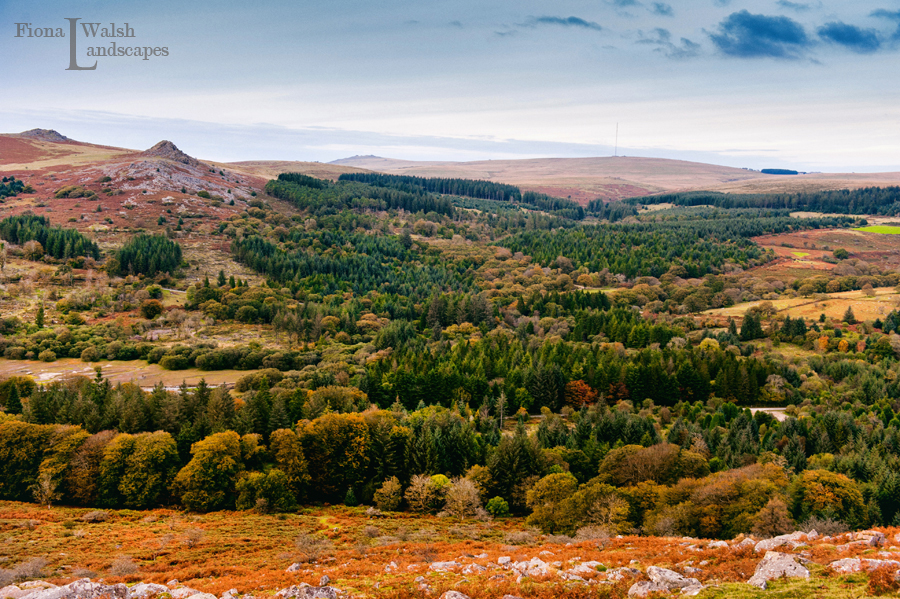 Nikon D700, 1/80, f/6.3, ISO 640, 24-70mm lens at 38mm.
Another example of using the space wisely. If I had pulled the camera back a bit and got more scene in to the left and right of the trees it would have detracted the eye from the trees that frame the path. If I had lowered my camera angle to get more of the path, we would have blank space (grass) where there are no trees to the left and right of the image. This shot was taken at standing level, but I also recommend trying out ground level. Lie down if you can or bend as low as possible. You might lose some of the leading path, but you gain with the tall trees. When you’ve taken your photo have a think and ask yourself how might someone else photograph this?
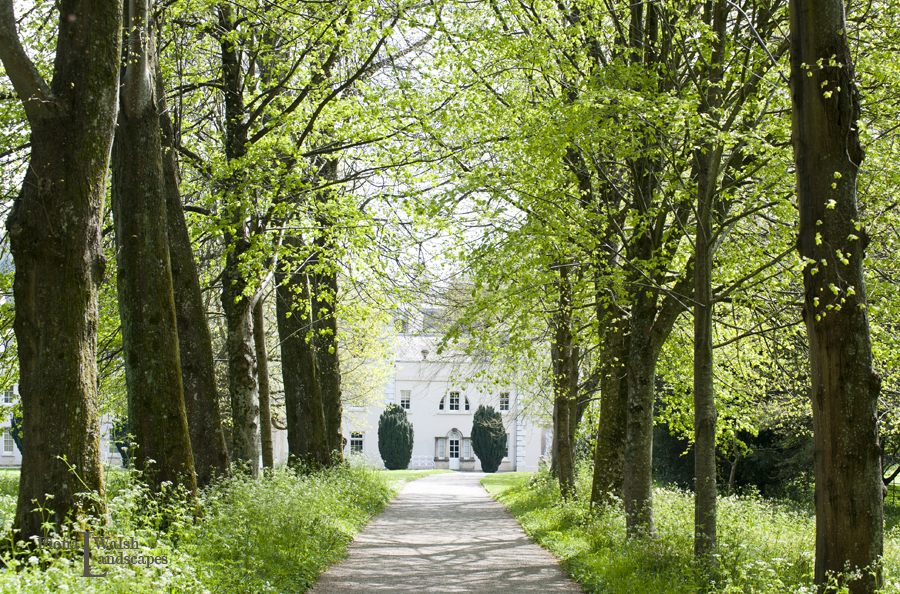 Nikon D700, 1/400, f/5.6, ISO 220
 Fiona Walsh is an award winning wedding photographer who captures moments that mean so much to that individual, and creates striking images with a creative and romantic twist.
Fiona also does wedding photography training. If you’d like to see footage of Fiona working on a real wedding take a look at this video, Click Here!
Find Fiona Walsh Photography on the Web: Website | Facebook | Twitter |Pinterest | Instagram
Here is Fiona’s Landscape website, and facebook page too!