We’ve all read it in photographer bios, you maybe even have it in your bio, “Jane is an on-location, natural light photographer”, meaning, Jane doesn’t have a studio. Do you think to yourself, “Poor Jane, she has to schlep all her gear and props around?” Are you Jane? Because I am!
I used to long for a studio space. My own private oasis of props and drops. It would look fabulous and it would stream in the most beautiful light from 8am-8pm, but frankly, I don’t want the overhead of an actual studio space right now. More than that though, I love going to client’s homes. I get to know them so much better when I can see their space and it is less stress on them. Have you ever tried to get out of the house with a newborn and toddler? So I’ve learned to master the in-home session, LOVE the in-home session, and you can too!
This image is a composite. I use parents as my spotters and assistants when needed. Nikon D700, 50mm, f2.5, 1/200
Have a Plan: The most important part of the in-home newborn session is to have a plan and be prepared. I cannot stress enough just how much easier the session will go if you spend some time the day before to plan out what you are doing and what you are bringing. A few days before an in-home newborn session I sit down and plan out the session.
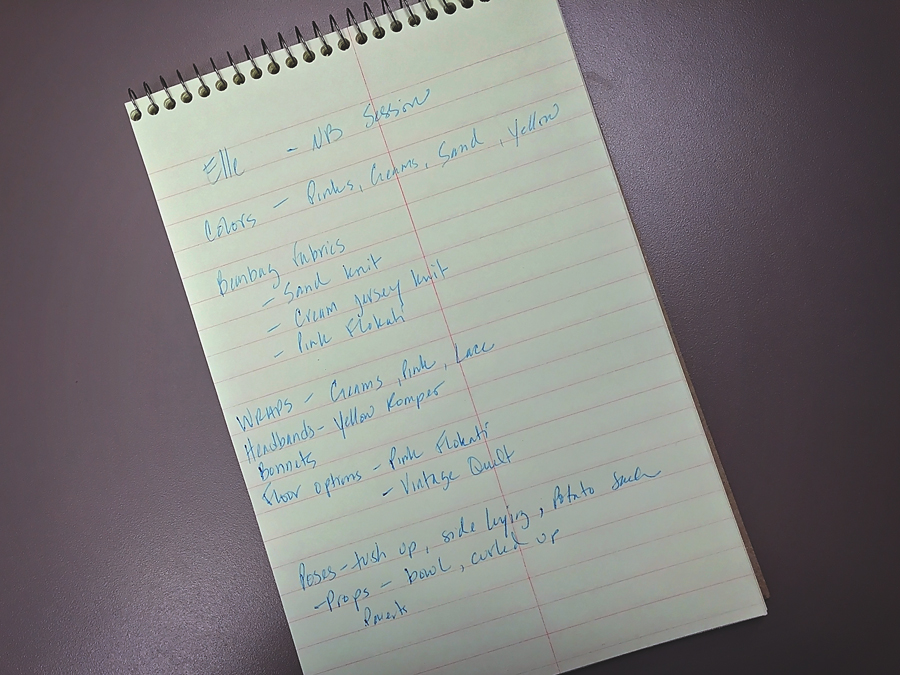
I am very detailed in my session plan, down to which hat, headband or romper I will use with each set up.
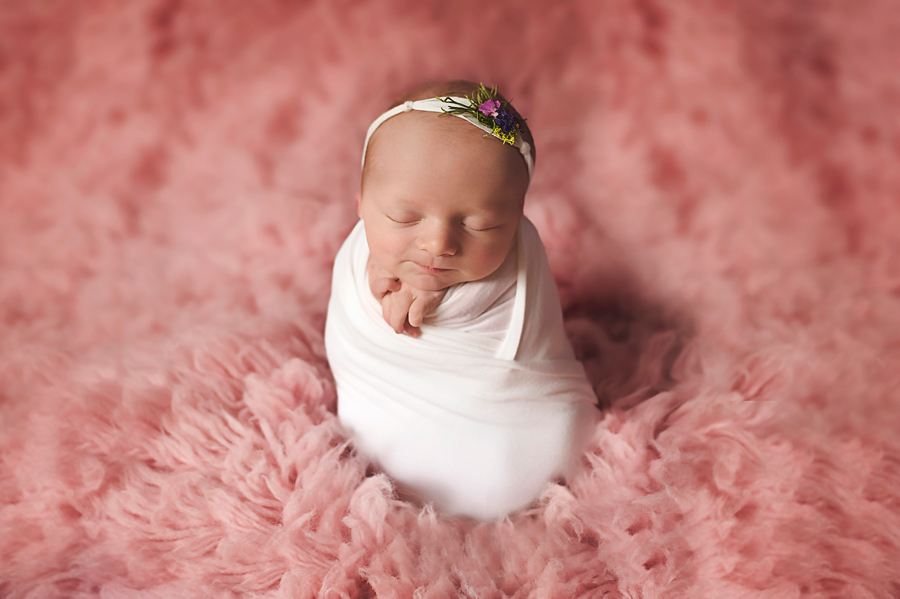
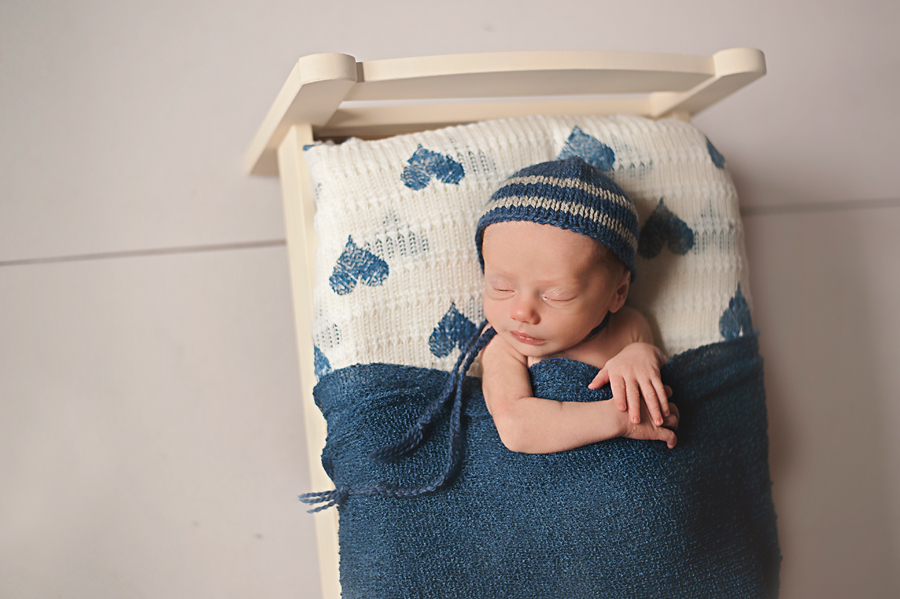
I start by writing down the colors I plan to use. Then I will write out the session flow. Above is an example of how I might write out a session plan: Pink flokati, baby wrapped, white wrap, quilt bonnet. You can see how this came to life below.
Final image based of session workflow plan. Nikon D700, 50mm, f2.5, 1/320
Writing everything out helps me to be intentional in what I am doing, and more importantly what I am bringing and what I am using it for. The more intentional you are when you plan the session the more organized you will feel and the less stressed you will be at the session
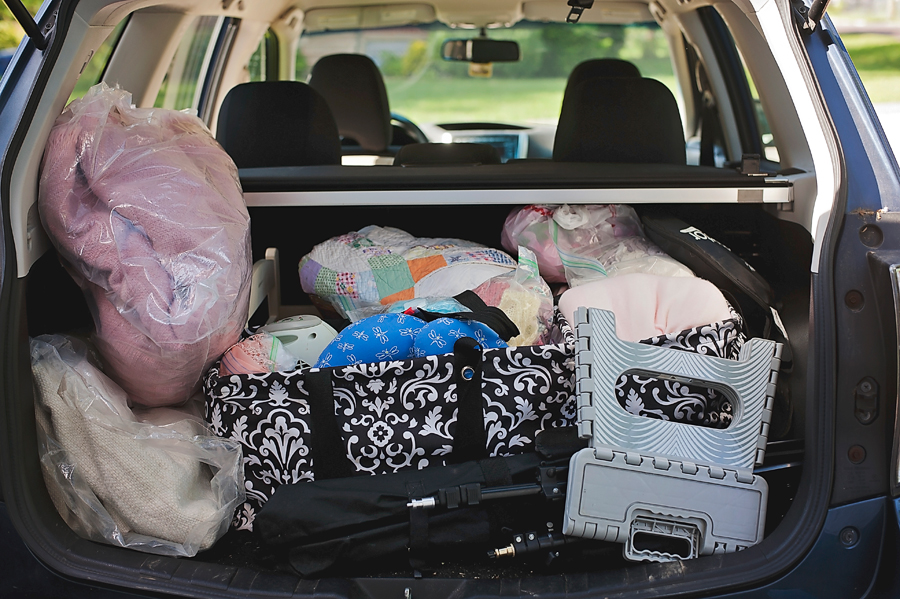
My car all packed up and ready to head to a newborn session. What you can’t see is my newborn posing bag in the backseat.
Get Organized: This is where your session plan really comes in handy. I bring what I’ve written for the session plan to my storage room and begin to pull out all the props, drops, stuffers and accessories I’ve written on my list. (Don’t forget to include things like step stool, space heater, or clamps on your session plan. Then you can easily check items off while you are getting organized.) Once I’ve pulled it all out, it’s time to pack it up! I like to pack up everything (except camera equipment) in my car the night before the session. By doing it the night before I don’t feel so stressed in the morning when I am leaving for the session because I know everything is ready to go and I don’t have to worry about forgetting something.
The Session: When I arrive at a client’s home, the first thing I do is ask to look around the house so that I can see how the light behaves in different rooms. I will look for a room that has a good natural light source with large windows and that is large enough for me set up in. I personally use a travel size newborn posing bag, but I have several newborn photographer friends who utilize just the floor, or a small folding table. What I like about using the posing pillow is that the baby is elevated which allows for more light to fall on baby. I also use a background stand for fabric drops, but there is the rare occasion when space is so tight that I have mom or dad simply pull the blanket up tight when needed. To be successful at in-home newborn sessions you have to be flexible. You have to be able to go with the flow because you don’t know what you will be walking into. I will have mom give baby a feeding once I arrive and while I am going in and out of the house to bring in my goodies and get my spot set up. This is usually the perfect amount of time for me to get situated.
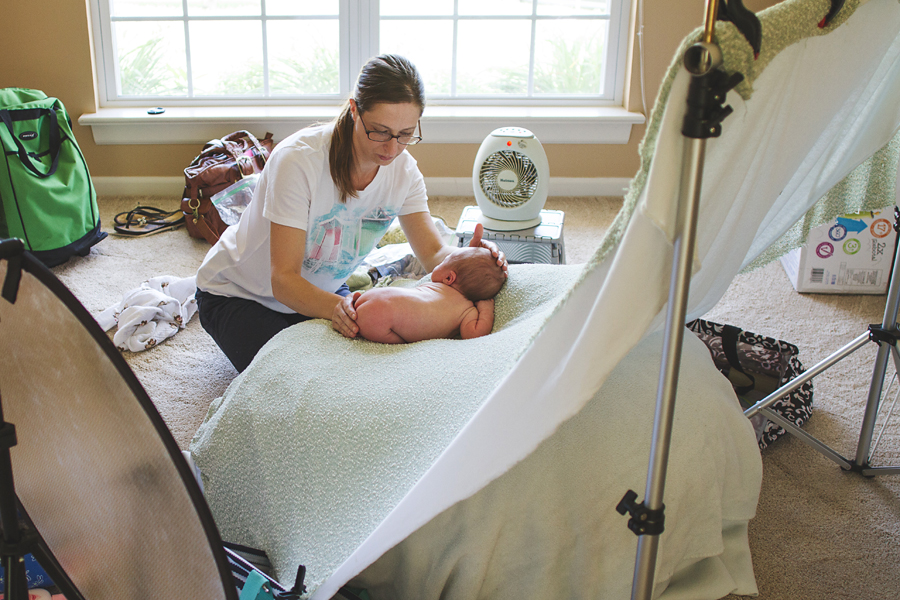
Behind the scenes at an in-home newborn session. This particular room had huge windows that let in crazy amounts of light. You can see from the image that the posing bag and baby are angled to 45-degrees from the window. Photo courtesy of Brandon Krepel Photography.
Working with Baby: I position the baby at a 45-degree angle to my natural light source with a reflector on the opposite side of the light source. If you aren’t currently using a reflector, start now. Seriously. I ALWAYS bring a sheer curtain. The light will change as the session goes on and if your light suddenly becomes to harsh, it’s much easier to hang a sheer curtain over the window to diffuse the light then it is to change your set-up location in the house. I ALWAYS bring a small space heater as well. In my prep instructions to parents I ask that they set their thermostat to 78 degrees to get the whole house nice and warm so baby will be comfortable. Then I use the space heater as needed. If I am wrapping baby up for a bunch of shots, I will turn the extra heat off for those images, and then back on to keep baby warm once unwrapped.
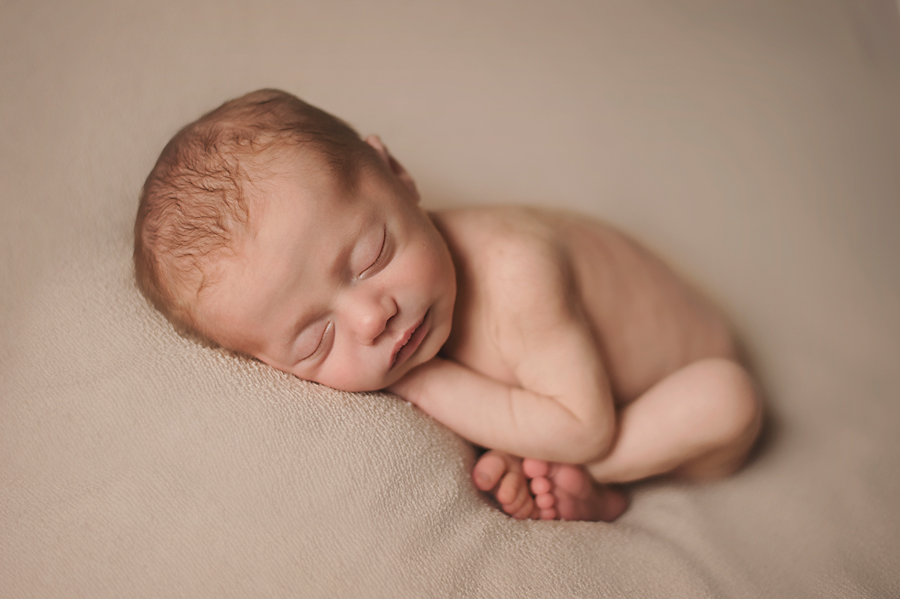
Final image from natural light at 45-degree angle. Nikon D700, 50mm, f2, 1/200
I like to use two different fabric drops for posed shots, a flokati rug, and one or two props. My style is simple, with the focus on baby. This works great at in-home sessions because I can still give my clients the amazing images they love, that represent my personal newborn session style, without me having to bring a bunch of vinyl backdrops and knick knack props to cutesy it up. Instead, I like to use a simple bowl or doll bed and I will often use fabrics, quilts, and a mat floor for floor options. I love the floor mats from Intuition Backgrounds by Becky Gregory. They work great on carpet (or you can even hang from your background stand as a backdrop!) as opposed to vinyl that can bunch and wrinkle when not on a hard flat surface.
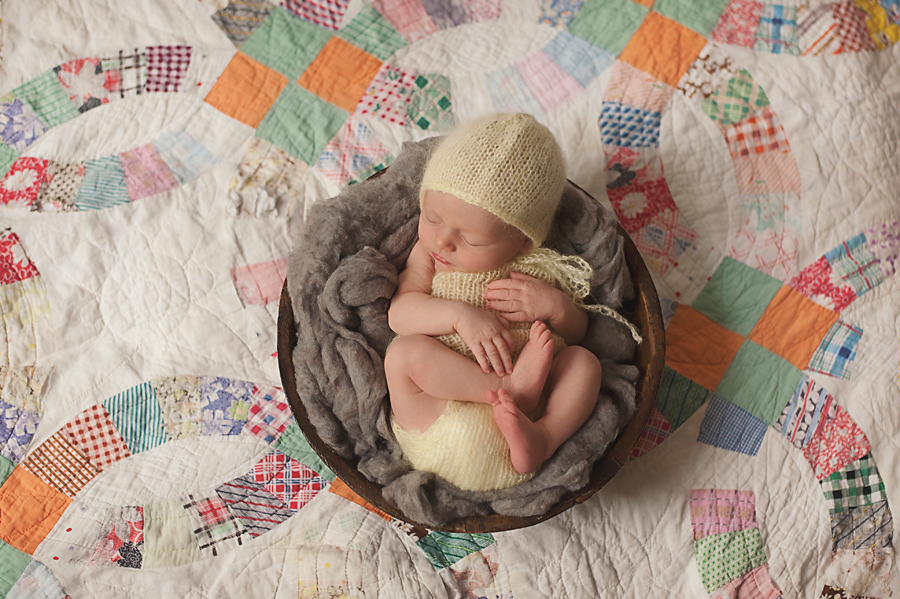
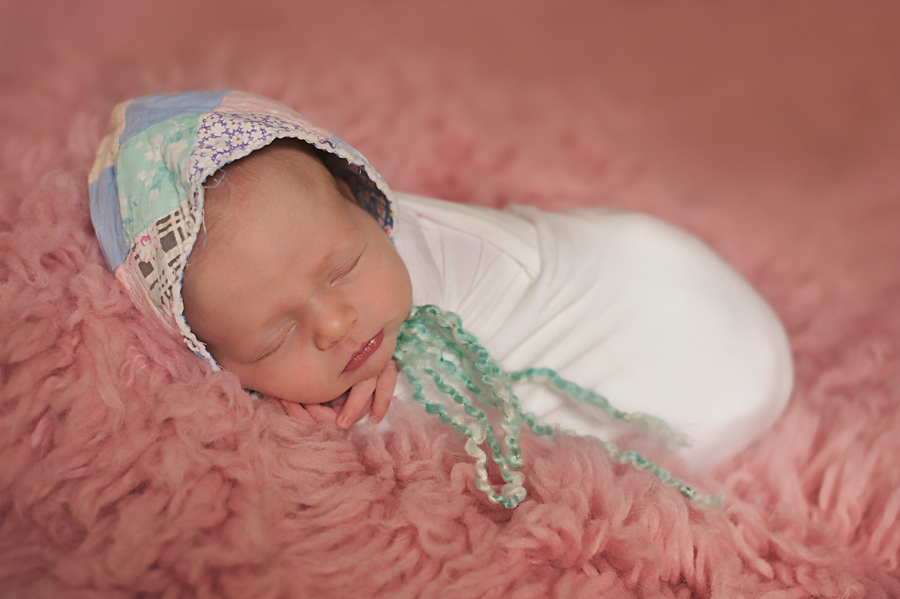
Baby in bowl with vintage quilt as floor drop. If you look back at my session plan for this little nugget, you will see this exact set-up written down. Nikon D700, 50mm, f2.5, 1/250
Baby in bed with mat floor from Intuition Backgrounds. Nikon D700, 50mm, f2, 1/200
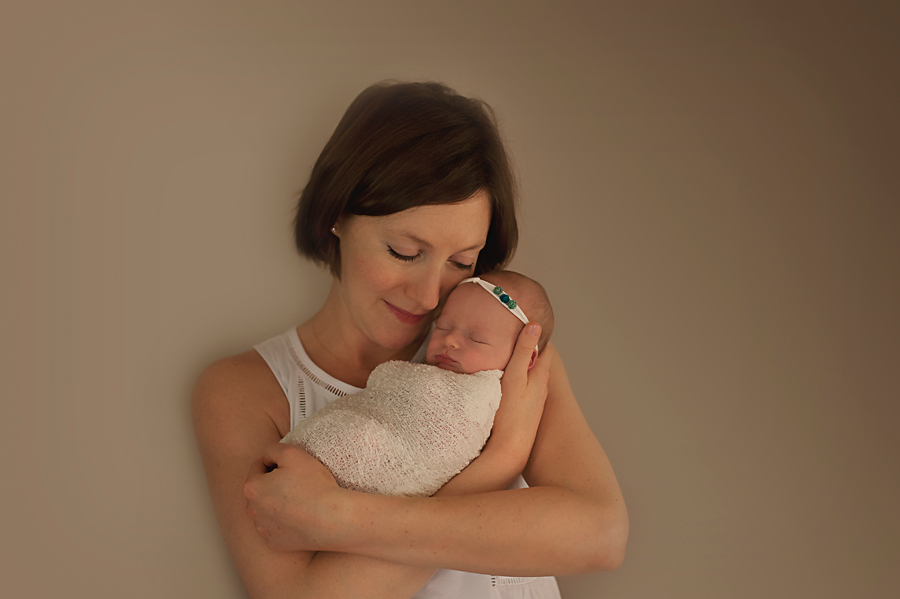
Working with Parents and Siblings: For parent and sibling shots there are two easy ways to get great images without having to bring lots of backdrops. If your client has nice neutral color paint on the walls, find an area with open wall space and use that as your backdrop! You can pose them in some of the signature parent style poses with baby up close to mom’s cheek or dad giving a quick kiss to his little one. I always use a stool when shooting parent shots like this. It gives me a little extra height to be able to shoot slightly down on them.
This background was a wall in the client’s living room. Nikon D700, 50mm, f2.5, 1/160
For sibling shots, keep it simple. Pose baby with big brother or sister on a flokati and shoot down. Or, if old enough, you can have the sibling hold baby.
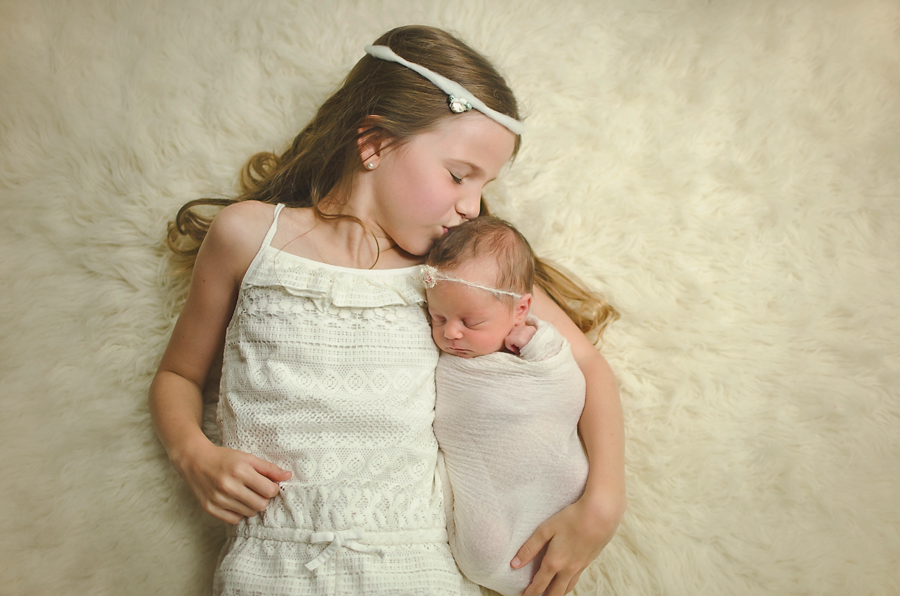
Big sis here was definitely capable of holding her little sister and taking direction from me. That’s not always the case when you’ve got a much smaller age gap between siblings. Nikon D700, 35mm, f2, 1/500
For family shots I love to utilize a big bed or sofa in my clients home. It’s comfortable for the kids and parents. But the best part of utilizing a bed or couch in the home is that you don’t have to lug huge backdrops around that can accommodate a larger family.
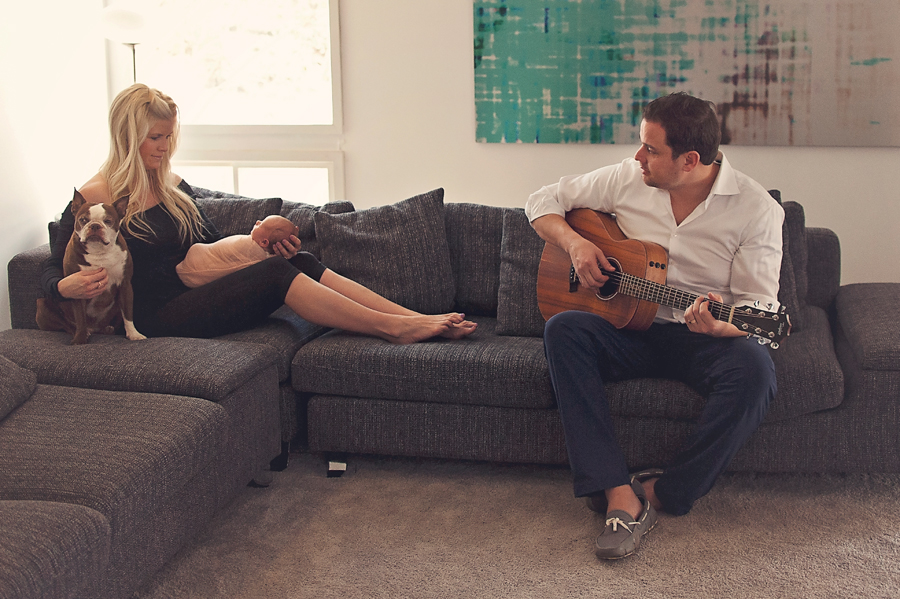
I love this family shot using this sofa. Nikon D700, 35mm, f2.5, 1/640
Ending the Session: Once I have gotten all the shots I need and the session is over, I like to take minute to go over with mom or dad exactly how long it takes for them to get their images back, confirm that they want to do a sneak peek on social media (even though they have already signed off on this on my contract, a verbal confirmation is always good). I like to take a few minutes and snuggle baby a little or if they have an older sibling, I will play with them for a few minutes. It’s a great way to end on a happy note. Then it is just a matter of getting my stuff out of the house and back into my car.
 About the author: Jen Killion is an on-location photographer based out of St. Louis, MO and specializes in newborn, children, and family portraiture. Jen started in film photography when she was just 12, learning from her father, also a photographer and finally moved into digital photography in 2011 and she hasn’t looked back since! (Although she still misses the smell of developer on her hands.)
Find more of her work on the Web: Facebook / Instagram / Twitter